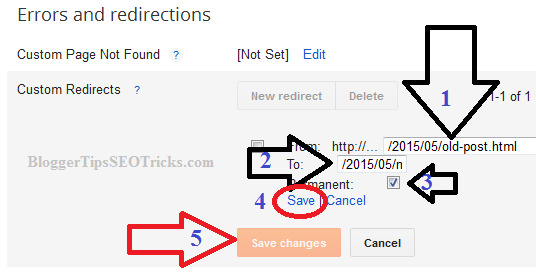
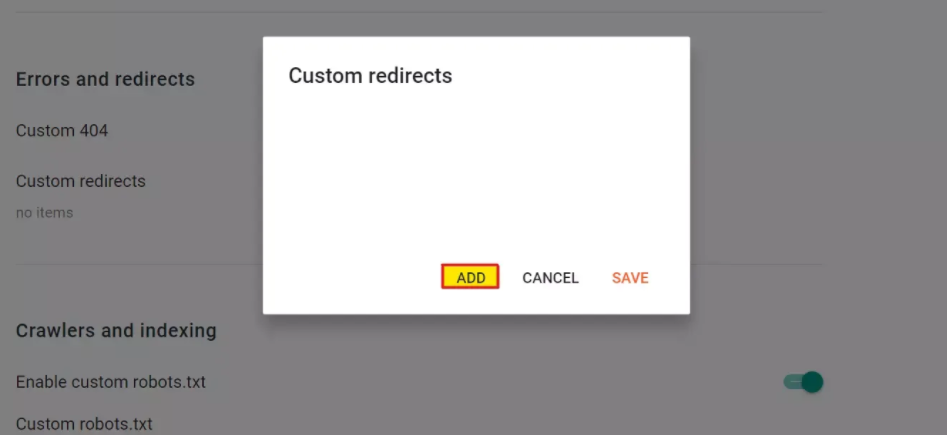
You can change the URL of your existing Blogger post, but doing so would make the old URL show a 404 error page instead of redirecting visitors to the new URL.
This is not good for visitors, your blog, or search engine optimization (SEO).
The simple solution is to use permanent redirection from the old Blogger post URL to the new post URL.
You can find custom redirect settings in your Blogger dashboard. I’ll discuss this in more detail later.
How to Automatically Custom Redirect Blogger Blog to Another Domain Or Website?
Your Blogger site will have an address ending in blogspot.com by default.
If you buy a custom domain for your site, like www.thewayoftheweb.net, then everything will work on your new site as long as the URLs of your posts stay the same.
But if you want to keep your old site, make sure that its URL does not end with blogspot.com.
Otherwise, it will show duplicate content, and you’ll need to delete or redirect it to your new website in order for people to see your post(s).
Custom Redirect Settings in Blogger
If you want to redirect a Blogger post to another URL, you can use five types of redirection: 300, 301, 302, 303 and 307.
All of them mostly used redirection in 301 and 302. Therefore, Blogger has both types of redirection options.
To know more about 301 and 302 redirects, follow the articles.
If you want to know more about all types of redirects, you may proceed to read this article.
- 302 Redirect: A 302 redirect is temporary. If you redirect your pages with 302 redirects, it means you temporarily redirect the Blogger post to another URL. Search engines can view it using the HTTP response. In that case, your link juice would not be passed i,e, PageRank and backlinks power. Clearly, it would not be best for SEO.
- 301 Redirect: A 301 redirect is permanent. If you have redirected a page with 301 redirects, the page will be moved permanently. In that case, the link juice would also be passed. Obviously, it is better for SEO. You should always consider 301 permanently redirect when redirecting your old posts to new posts.
Now, here is a simple guide to add a custom redirect Blogger post to another URL (or deal with the crawl errors) by redirecting the error pages to the targeted posts.
How to Remove Crawl Errors by Blogger Custom Redirects?
- Go to your Google Webmaster Tools (the Rebrand name is now Google Search Console).
- Select your property.
- Look on the left sidebar and go to Crawl -> Crawl Errors.
- You can view the “Not found” pages here, separated by desktop, smartphone, and featured phone. You can easily check the desired URLs that point to the page that was not found. If you find them, you can easily 301 redirect them to the targeted post.
- You can also view where and when Google detected “not found pages” by clicking on them.
Note that the technique is only for internal pages; you can use the custom redirect option to move your internal pages to another internal page.
If you have purchased a new domain and wish to redirect your current blog to the new domain, you will need a technique to redirect to external pages.
Some bloggers start blogging with a free Blogger platform, but later, they switch to WordPress sites with their own domain name.
In that case, they redirect the Blogger blog to the new domain in the following way.
If you wish to redirect your entire Blogger blog to a new domain, just follow the simple steps.
How to Redirect Blogger Blog to another Website Domain?
Here is how to redirect the Blogger blog to another domain:
- Go to your Blogger dashboard.
- Select your blog -> Template -> Edit HTML -> Click anywhere in the Blogger source code, and press Ctrl+ F.
search <b:include data=”blog” name=”all-head-content”/>. - Now paste the following line just below the above line.
- <meta http-equiv=’refresh’ content=’0;url=http://www.yournewdomain.com’ />
Here, the number 0 indicates how many seconds to wait before redirection to the domain.
If you have set 0, it is similar to 301 permanent redirects; otherwise, it would be 302 or 307 temporarily redirected.
You can also redirect your Blogger post to another post URL with JavaScript by the command “window.location=’http://example.com'”.
However, I would not recommend redirecting your pages using the JavaScript method as some browsers may have disabled it, and most search engines do not follow such redirects.
Redirect a Blogger Post to an External URL
First, I have to use Blogger’s conditional code to select a particular page or post.
Once we select the page that we want to redirect, we will apply the meta code to redirect it.
Don’t think so much, copy the below code and paste it just below to <b:include data=”blog” name=”all-head-content”/> code inside your Blogger source code.
<b:if cond=’data:blog.url == "Your-Blog-Post-URL-HERE"’>
<meta http-equiv=’refresh’ content=’0;url=External-Post-URL-HERE’ />
</b:if>
Change your blog post URL and the external post URL in the above code, and save the template.
Now, go to the post that you have redirected; you will see once it loads, it is redirected to the external domain post page. If you have any questions, feel free to contact us.
Quick Links:
- Tips for Blogger Success: Complete Guide!
- How Often Should You Update Your Blog?
- Tasks New Bloggers Need To Accomplish Before Writing a Word
- Steps to Develop Your Personal Brand as a Blogger
Conclusion: Can You Custom-redirect the Blogger Blog to Another Domain?
The Blogger team has given us a great feature: custom redirects, which allows us to redirect our internal pages to any other internal pages.
We can also improve our blog’s user interface by improving 404 not-found pages.
I have explained it in detail, but if you have any doubts, you may ask by comment.


